Are you finding it difficult to connect your Raspberry Pi VNC server while operating behind a Windows 10 firewall? You're not alone. Many users face hurdles when configuring remote connections due to network restrictions and firewalls. This comprehensive guide will walk you through the setup and configuration of Raspberry Pi VNC, with a focus on overcoming firewall obstacles on Windows 10.
Establishing a remote connection to your Raspberry Pi using VNC is a crucial skill for managing devices without direct physical access. However, firewalls can act as barriers that disrupt this process. By understanding how to properly configure your Raspberry Pi, VNC, and Windows 10 firewall settings, you can ensure smooth connectivity and significantly boost your productivity.
This guide is specifically designed for users seeking a dependable solution to create a secure and stable VNC connection from their Windows 10 device to a Raspberry Pi, even when a firewall is active. Let’s delve into the details and unlock the full potential of remote access.
Read also:Fleur Cates Wikipedia
Table of Contents
- Introduction to Raspberry Pi VNC
- Understanding Raspberry Pi and VNC Fundamentals
- Firewall Challenges with Raspberry Pi VNC
- Setting Up VNC on Raspberry Pi
- Configuring Windows 10 for VNC
- Configuring the Firewall for VNC Access
- Port Forwarding for Raspberry Pi VNC
- Troubleshooting Common Issues
- Enhancing Security for VNC Connections
- Conclusion and Next Steps
Introduction to Raspberry Pi VNC
Raspberry Pi has emerged as a versatile device favored by hobbyists, educators, and professionals. Its adaptability enables users to run a wide array of applications, including web servers, media centers, and remote desktops. One of the most sought-after tools for remote access is VNC (Virtual Network Computing), which empowers users to control their Raspberry Pi from another device, such as a Windows 10 computer.
However, connecting your Raspberry Pi VNC server behind a firewall can present challenges. Firewalls are designed to safeguard your network by blocking unauthorized access, but they can also interfere with legitimate remote connections. This article will provide detailed, step-by-step instructions to help you overcome these obstacles and establish a secure VNC connection.
Understanding Raspberry Pi and VNC Fundamentals
What is Raspberry Pi?
Raspberry Pi is a compact, cost-effective single-board computer developed by the Raspberry Pi Foundation. It is extensively used for educational purposes, home automation, and various DIY projects. The latest models, such as the Raspberry Pi 4, deliver remarkable performance and connectivity options, making them perfect for remote access applications.
What is VNC?
VNC, or Virtual Network Computing, is a graphical desktop sharing system that enables users to remotely control another computer. It transmits keyboard and mouse input from one device to another and displays the screen of the remote device in real-time. VNC is platform-independent and functions seamlessly across different operating systems, including Windows, macOS, and Linux.
Key Features of VNC:
- Remote desktop control
- Real-time screen sharing
- Compatibility with multiple platforms
- Encryption for secure connections
Firewall Challenges with Raspberry Pi VNC
Firewalls are critical for network security, but they can create challenges when establishing remote connections. By default, firewalls block incoming traffic to prevent unauthorized access. This behavior can interfere with VNC connections, as the Raspberry Pi VNC server requires specific ports to remain open for communication.
Read also:Understanding The Concept Of Masa 49 And Its Cultural Significance
To overcome these challenges, you must configure your firewall settings to permit VNC traffic. This involves opening the necessary ports and ensuring that the firewall does not obstruct incoming connections. We will explore these steps in greater detail later in the article.
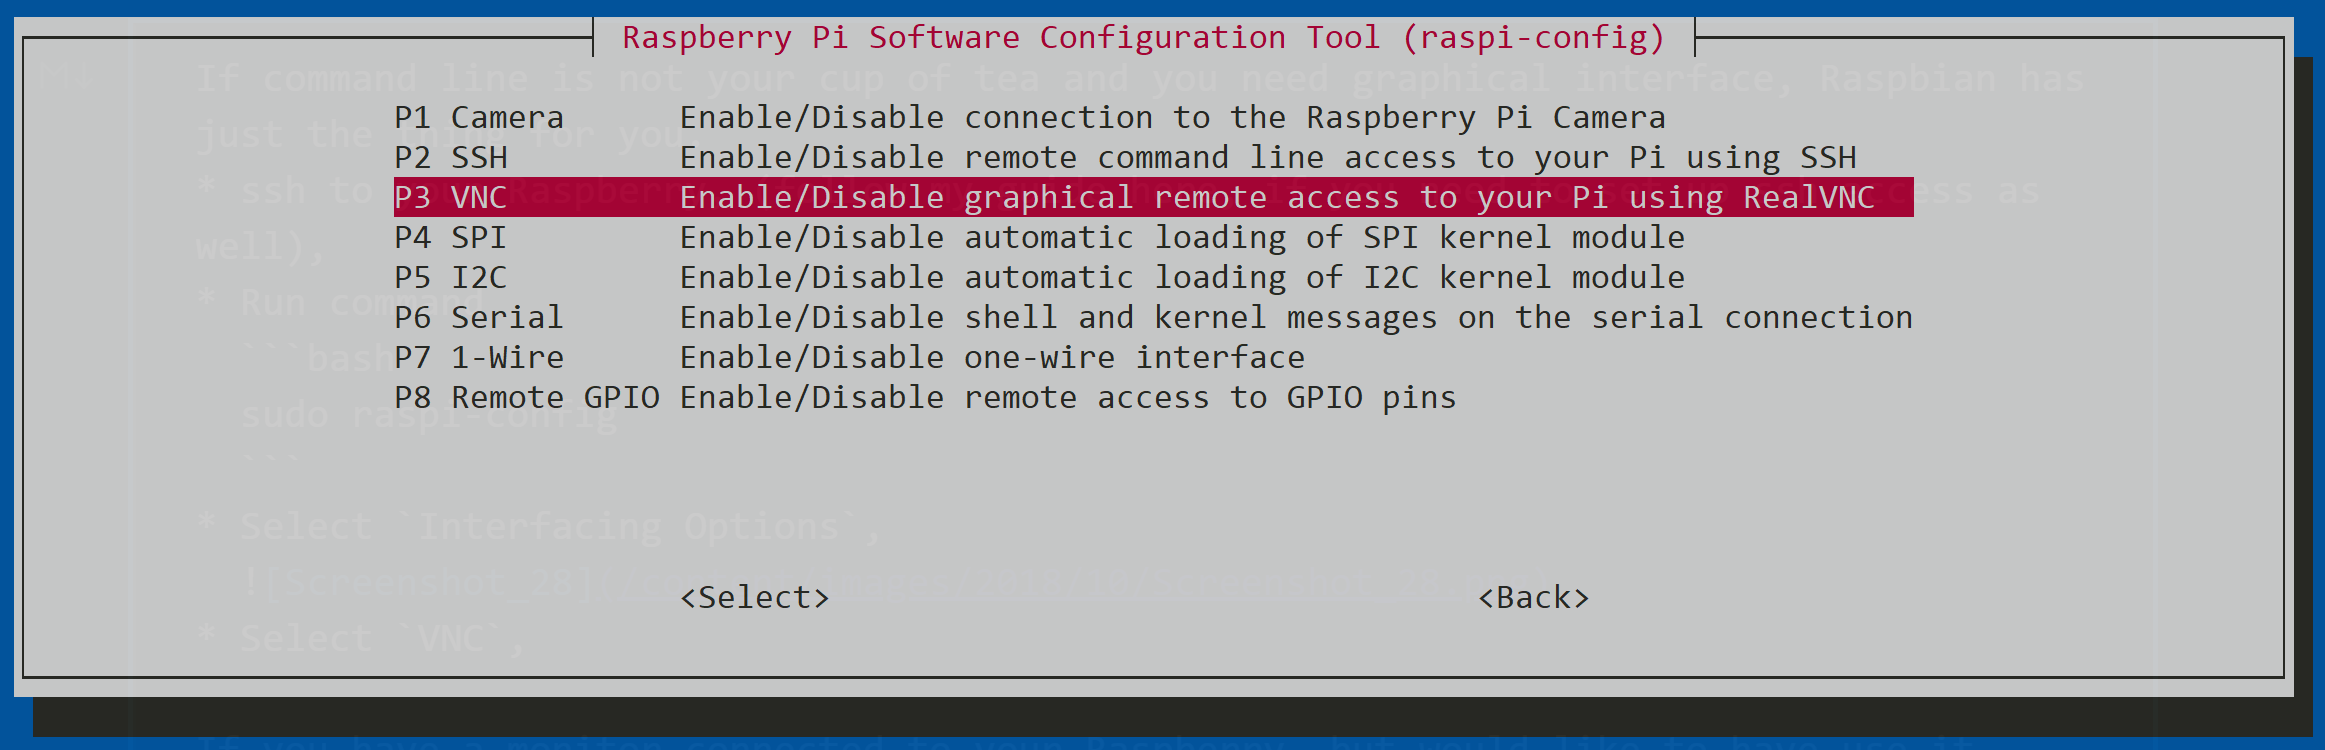
Setting Up VNC on Raspberry Pi
Before configuring your firewall, you need to set up VNC on your Raspberry Pi. Follow these steps to ensure your Raspberry Pi is prepared for remote access:
- Install the latest version of Raspberry Pi OS on your device.
- Enable the VNC Server by navigating to Preferences > Raspberry Pi Configuration > Interfaces and selecting VNC.
- Update your Raspberry Pi using the command
sudo apt update && sudo apt upgrade. - Install the RealVNC Viewer on your Windows 10 computer for remote access.
Configuring Windows 10 for VNC
Opening Ports in Windows Firewall
Windows 10 includes a built-in firewall that can block VNC connections. To allow VNC traffic, you need to create an inbound rule for the VNC server port (default is 5900). Follow these steps:
- Open the Windows Defender Firewall settings.
- Select Advanced Settings from the left-hand menu.
- Click on Inbound Rules and then New Rule.
- Choose Port and specify port 5900.
- Allow the connection and apply the rule to all network profiles.
Configuring the Firewall for VNC Access
In addition to the Windows 10 firewall, your router's firewall might also block VNC connections. To resolve this issue, you need to configure your router to allow VNC traffic. This involves opening the same port (5900) on your router and ensuring that it forwards incoming connections to your Raspberry Pi's IP address.
Steps to Configure Router Firewall:
- Log in to your router's admin panel using its IP address (typically 192.168.0.1 or 192.168.1.1).
- Navigate to the Port Forwarding section.
- Add a new rule for port 5900 and specify your Raspberry Pi's local IP address as the destination.
- Save the settings and restart your router if required.
Port Forwarding for Raspberry Pi VNC
Port forwarding is an essential step in enabling remote access to your Raspberry Pi VNC server. It allows incoming traffic from the internet to reach your device by routing it to the correct internal IP address and port. Without port forwarding, your Raspberry Pi will remain inaccessible from outside your local network.
Benefits of Port Forwarding:
- Facilitates remote access from anywhere in the world
- Enhances connection stability and reliability
- Reduces latency and improves performance
Troubleshooting Common Issues
Even with proper configuration, you may encounter issues when trying to connect to your Raspberry Pi VNC server. Below are some common problems and their solutions:
Connection Timeout
If you receive a connection timeout error, ensure that:
- Your Raspberry Pi is powered on and connected to the network.
- The VNC server is running on your Raspberry Pi.
- The required ports are open on both the Windows 10 firewall and the router.
Authentication Failed
If you receive an authentication error, verify that:
- Your VNC password is correct and meets the necessary complexity requirements.
- Encryption is enabled on both the server and client.
Enhancing Security for VNC Connections
Security is crucial when setting up remote access to your Raspberry Pi. To protect your device from unauthorized access, adhere to the following best practices:
- Use strong, unique passwords for VNC authentication.
- Enable encryption for all VNC connections.
- Restrict access to specific IP addresses using firewall rules.
- Regularly update your Raspberry Pi and VNC software to address vulnerabilities.
Conclusion and Next Steps
In summary, connecting your Raspberry Pi VNC server behind a Windows 10 firewall necessitates meticulous configuration of both your device and network settings. By following the steps outlined in this guide, you can establish a secure and stable remote connection that enhances your productivity and flexibility.
We encourage you to share your experience with Raspberry Pi VNC in the comments below. If you found this article helpful, consider exploring other topics on our website or subscribing to our newsletter for the latest updates and tutorials.
Call to Action: Don't forget to bookmark this page for future reference and share it with your friends and colleagues who may also benefit from this guide.